I have a 2001 Ford Escape and a 2003 Full Size Dodge Ram (Diesel power baby) and both have fogged headlights. It got so bad on the Ford, that one night comming home a fellow commuter stopped me at a traffic light to inform me I had a burnt out headlamps! OK so one low beam was really gone but then I drove around for almost a week with high beams on and no one even noticed, they were so dim.
It is not only me that seems to have this problem, I have recently seen a number of kits sold to "restore" headlights...Yeah, we have tried a couple and it did not help at all.
Enough is enough, time to fix it. SO I broke down and just ordered a couple of low-cost (only $54 + Shipping) Eagle Eye replacements from: Auto Lighthouse (amazon.com)
Link:
http://www.amazon.com/gp/browse.html?ie=UTF8&marketplaceID=ATVPDKIKX0DER&me=A1SXRL9TLLIUJK
They arrived in a few days...
 |
| Boxes Arrive! |
 |
| Before Shot |
Typical of parts like these to have absolutely no instructions!
Don't get fooled into thinking that you can remove the lower bolts from the outside with the fender attached, that part you see from under is a threaded insert, not a nut, and the bolt can only be removed from inside the engine compartment!
 |
| RH Side removed |
Well, I suppose the replacement could be done with the fender in place ~ I just did not see it as an issue~ while it looks drastic; this made access very simple and really only took a few minutes. If you look closely there is some overlap and I did not want to damage the new assemblies.
 |
| Amber Running Bulb was not included |
 |
| Full access - Granted! |
From this stage ~The replacement went easy~ A few simple steps:
Remove the bolts, remove old assemblies, install new assemblies, re-install and and then tighten bolts!
Remove the bolts, remove old assemblies, install new assemblies, re-install and and then tighten bolts!
:
 |
| Bolts are metric! |
The socket extension is needed for the lower bolt, but the deep metric socket is not. This is the one that looks like you may be able to undo from under the car.
 |
| The bottom one - inside the engine compartment |
With the bolts removed, the lamp assys are still attached! Nope, no more bolts ~ The mysterious force that holds them is...


Just a couple of tabs on the top which hold the assemblies in, they also help alignment, and simply snap in to hold it in place. Gently pry both out while pushing slightly on the lamp assy:

New parking light bulbs are not included, but the old sockets simply twist in:
The hole is covered by a sticker for shipping...

New parking light bulbs are not included, but the old sockets simply twist in:
 |
| Parking light - No need to remove the cables |
The hole is covered by a sticker for shipping...

Finally, fit the new assembly in place, But the paper stickey made a handy place to note the job date!

There are some aim alignment set screws but I did not even have to fool with these at all. The aim was just fine, I may get the dealer to look at the aim the next time it is in the shop just to be sure.
Fits just like an original OEM assy:

OK the worst part of the project were two of those damnplastic screws. I don't think these were really meant to be removed by turning there must be a special tool and they behave much like a stripped screw so they must be pryed a little to get them to turn out. There are two of these buggers up in the wheel wells, I saw no reasonable way to get them out so, as you see...
 |
| Backside of lamp assy. |

OK the worst part of the project were two of those damnplastic screws. I don't think these were really meant to be removed by turning there must be a special tool and they behave much like a stripped screw so they must be pryed a little to get them to turn out. There are two of these buggers up in the wheel wells, I saw no reasonable way to get them out so, as you see...
 |
| Spare Pasrts? |
Brute force and ignorance wins again! Just because I have some tools and coveralls I make no claim to be a mechanic.

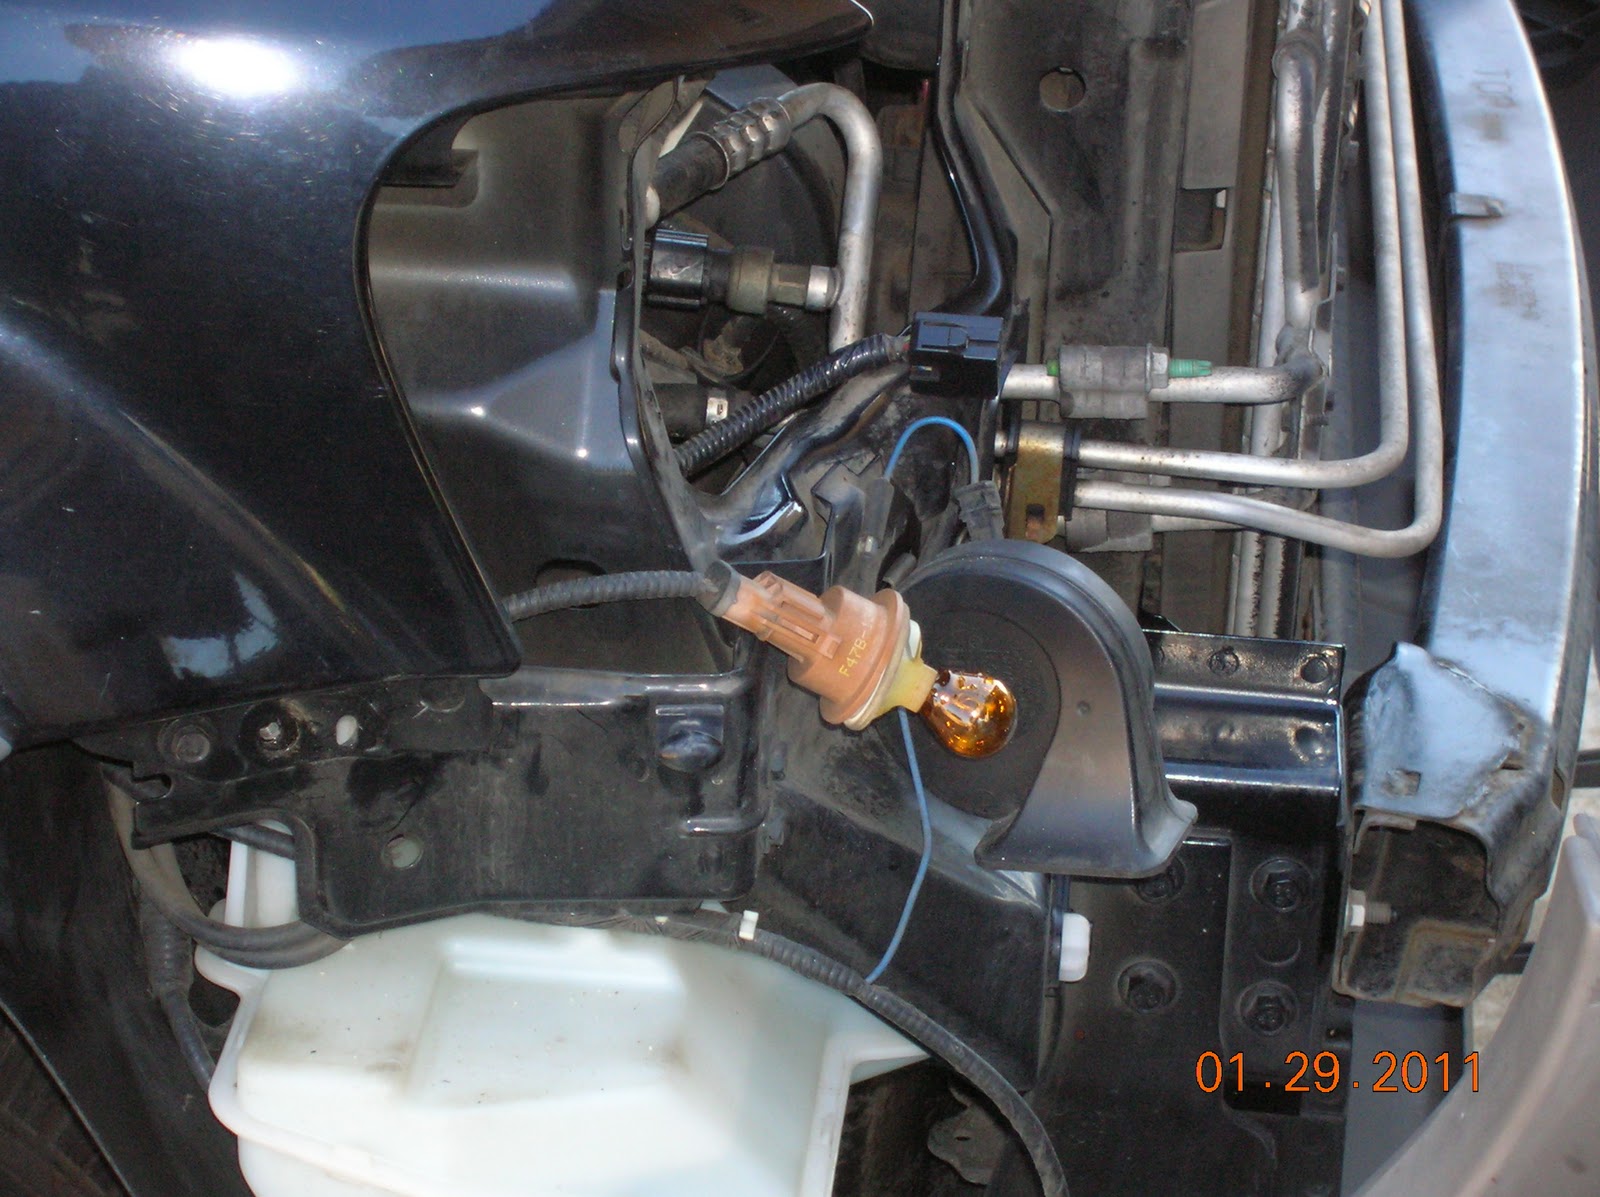
BTW - this would have been a great time to replace fog lamps, (that is the black assy. seen in the upper left of this picture) I did not need to, but the only way to get to these bulbs is to move the bumper as well. Fortunately you can get to them from the bottom with only removing some of the lower holding hardware.
This plastic nut is located at the top of the wheel well, it hooks in here:

I think these fasteners are simply pushed in at the factory so dissasembly is not a consideration. After a few mins of assessing the problem I took the easy way out!

Conclusion: What a difference!
 |
| New vs. Old - Exact fit (The camera angle makes the sizes look wierd) |
It is great to see the road again...not just the reflector things. There is no way I could run around now with the high beams on, they are very bright indeed and would be noticed by other drivers for sure! The only thing I notice is there are some "streaks" in the beams, like a flashlight, not an even flood of light, maybe it has just been so long I forgot if the originals did this as well, but all-in-all not too bad.
 |
| After! |
These look good and were only a Sarurday morning project to change... I think will put in some better Halogen headlamps when the Halogen bulbs that came with them go out, but for now white is OK.
The truck will be next...Stay tuned.
 |
| My Helper! No bunnies bothered me during this fix! |
No comments:
Post a Comment